Discover how AI is transforming astrophotography image processing with cutting-edge tools like RC Astro, GraXpert, StarNet++, and more. Explore their benefits, controversies, and how they compare to traditional methods.


Harmonic Drive mounts, also known as Strain Wave Gear mounts, have been gaining traction in the astrophotography community due to their unique design and performance advantages over traditional worm gear mounts. In this guide, we'll explore the distinctions between these two types of mounts and highlight some notable Harmonic Drive mounts from manufacturers like ZWO, Sky-Watcher, Pegasus Astro, and others.
Understanding the Difference: Harmonic Drive vs. Worm Gear Mounts
Traditional worm gear mounts utilize a worm screw meshing with a worm wheel to achieve the necessary gear reduction for precise tracking. While effective, this design can suffer from backlash—a slight lag when reversing direction—due to the inherent gaps between the meshing gears. Backlash can affect tracking accuracy, especially during long-exposure astrophotography.
In contrast, Harmonic Drive mounts employ a strain wave gearing system comprising three main components: a wave generator, a flexspline, and a circular spline. The wave generator deforms the flexspline, causing it to engage with the circular spline in a manner that ensures a large number of teeth are in contact at any given time. This design virtually eliminates backlash, offering smoother and more precise tracking. Additionally, Harmonic Drive mounts are typically more compact and lightweight, often eliminating the need for counterweights, which enhances portability—a significant advantage for field astrophotographers.
Impact on Performance
The zero-backlash characteristic of Harmonic Drive mounts leads to improved tracking accuracy, which is crucial for capturing sharp images during long exposures. The high torque capacity of strain wave gears allows these mounts to handle substantial payloads relative to their size, further contributing to their appeal among astrophotographers seeking a balance between portability and performance. However, it's worth noting that while Harmonic Drive mounts offer these advantages, they may exhibit higher periodic error compared to well-tuned worm gear mounts. This periodic error can be mitigated through autoguiding techniques, but it's an important consideration for users aiming for the utmost precision in their imaging.
Popular Harmonic Drive Mounts
Here are some notable Harmonic Drive mounts from various manufacturers:
ZWO AM5: The ZWO AM5 is a compact and lightweight mount that supports up to 13 kg without a counterweight and 20 kg with one. It operates in both equatorial and alt-azimuth modes, providing versatility for different observational needs. The mount integrates seamlessly with ZWO's ASIAIR system, allowing for wireless control and an intuitive user interface.
Sky-Watcher 100i: The Sky-Watcher 100i is an affordable Harmonic Drive mount priced at $1,695. It offers a payload capacity of 10 kg without a counterweight and 15 kg with one, making it a compelling option for those seeking a balance between cost and performance.
Pegasus Astro NYX-101: The NYX-101 is designed for astrophotographers requiring advanced tracking capabilities and remote operation features. It boasts a payload capacity of up to 20 kg without counterweights and 30 kg with them, positioning it as one of the more powerful Harmonic Drive mounts available.
Rainbow Astro RST-135: Weighing only 3.3 kg, the RST-135 is one of the lightest Harmonic Drive mounts on the market. Despite its lightweight design, it can support up to 13.5 kg without a counterweight and 18 kg with one. Its exceptional tracking accuracy and portability make it an excellent choice for astrophotographers on the move.
iOptron HEM27: The iOptron HEM27 is a budget-friendly hybrid Harmonic Drive mount that combines a strain-wave drive system with traditional worm gears for added stability. It supports a payload capacity of 13.5 kg without a counterweight and 20 kg with one, offering a good balance between performance and affordability.
Conclusion
Harmonic Drive mounts present a compelling alternative to traditional worm gear mounts, especially for astrophotographers prioritizing portability and reduced backlash. While they come at a higher price point and may require considerations for periodic error correction, their advantages make them worthy of consideration for both amateur and seasoned astrophotographers.
If you're interested in purchasing a Harmonic Drive mount, consider supporting Mac Observatory by visiting Agena Astro. By using our affiliate link, you help us to continue to produce astrophotography articles and reviews.

This is the main EKOS window. On the left are tabs that represent different sections of the application.
EKOS is the capture suite that comes as part of the KStars Observatory software package. It's a free, fully automated suite for capturing on Mac, Linux, and PC. It's not to dissimilar to Sequence Guider Pro on the PC. While the capture suite comes with KStars, you're not limited to using KStars. EKOS will also allow you to send commands to your mount from SkySafari on the Mac as well.
I'll break down it's use and capabilities screen by screen.
In the main window shown above, you see tabs that represent each part of the application which include the Scheduler, Mount Control, Capture Module, Alignment Module, Focus Module, and Guide Module. From the main window you will see the currently taken image, the seconds remaining in the next image, as well as which image number you are on during the sequence, and the percent complete of the entire sequence with hours, minutes, and second remaining in your sequence. Additionally to the right of your image, you see your target and tracking status, focus status, and guiding status.

This is the Scheduler window, where you can pick your targets, and assign capturing sequences to them.
From the Scheduler, you can pick your targets, and assign them capture sequences (which are set up in the imaging module). Additionally there are some overall parameters you can set here for starting a session and ending a session. If you have a permanent observatory, you do things here like open and close your observatory with startup and shut down sequences, or set parameters for when to run your schedule based on the twilight hour, weather, or phase of the moon. The scheduler lets you set up multiple imaging sessions, mosaics, and more. And as the twilight hour approaches, it will start up and pickup imaging based off of priorities you set, or object priorities based on their visibility in the night sky. Imaging sessions can be set for a single night, or can be taken over multiple nights if it wasn't able to complete them in a single night.

Mount control is fairly straight forward. This window shows the current aperture and focal length of your selected equipment. You can save multiple equipment configurations from this window for various telescope and guide scope combinations that you might have. Current tracking information is also shown in this window. If you select Mount Control in the upper right of the screen, it pops up a floating window with arrow buttons, speed and goto functions for manually controlling the mount. You can search for a target, and manually go to an object in the sky to start an imaging session without setting one up in the scheduler.

From here you control all aspects of your imaging camera including setting up imaging sequences. For instance, I might have 7 hours of night time to image before the sun rises. I can divide that time up between each filter, and save the sequence of 120 captures, at 60s each at -20°C for each individual filter, and save that as a sequence which I can later load and reuse anytime I want to run that session during a 7 hour window. Or I could say I want 20 hours total on an object, and set all parameters for each filter to accommodate a 20 hour session, and save it. Or maybe I want one session for LRGB, and one for narrowband imaging. You can also set flat, dark and bias sequences. Flats have an awesome automatic mode, where you can set a pre-determined ADU value, and it will expose each filter automatically to the same ADU and capture all your flats in a single automatic session. It also supports hardware like the FlipFlat so that flat sessions can be run immediately following a nights imaging session. Additionally you can set guiding and focus limits for imaging sessions, and control when your meridian flip occurs.

Here you can control all focus functions if you have a computer controlled focuser. I highly recommend getting one of these. Focusing can be set up to run automatically. It will capture a single image, and auto select a star, then run a sequence where it continues to capture, while moving the focuser in and out. Each time it is graphing the HFR on a curve plot trying to find the best point of focus. Depending on seeing conditions, it can get focusing down in 3-4 iterations, or sometimes 20. All parameters including threshold and tolerance settings for focusing are controlled in this window.

From this window you can polar align (assuming you can see Polaris), and also plate solve to locate an object center window or improve GOTO accuracy. Since I can't see Polaris from my location, I have to use my mounts built in All Star Polar Alignment process, then I can come to this window to capture & solve a target to improve it's GOTO accuracy. There are several nice features accessible here. You can load a fits file from a previous imaging session, it will plate solve the image, then move your telescope to that precise point to continue an imaging session. Or you can select targets from the floating mount control window, then capture and solve, or capture and slew to bring the mount as close to center of the target as possible. EKOS automatically uses this function during an imaging session to initially align to a target, and then realign once the meridian flip occurs.

The guide module handles all guiding through your guide scope and camera. Press capture in the upper left, and hit guide, a star will be automatically selected, calibration starts, and once calibrated guiding begins. Additionally options can be set for dithering, and guide rate. For people who prefer PHD2, EKOS integrates seamlessly with it, and even shows PHD2's guiding graphs within the app and on your overview tab. I've not personally had any issues using the EKOS guiding, and it has an additional benefit of being able to reacquire a guide star after clouds interrupt your imaging session, and can continue the imaging session when it's clear again.
As someone who images regularly, and doesn't have a permanent setup (like an observatory), I like how much of the application can automate my nights imaging sessions. There is little else available on the Mac that is this full featured. The Cloudmakers suite comes in a close second for me, but is initially easier to set up and use. Additionally TheSkyX is also a full featured suite, however I've not used it. The setup process with EKOS isn't too difficult once you get an understanding of how the modules interact with each other and what all the options do. I hope this brief overview gives you enough of an idea that you can setup and use the software on your own. EKOS has a healthy number of contributors on the project, and regularly sees updates on a monthly basis, and has good support through it's user forums.
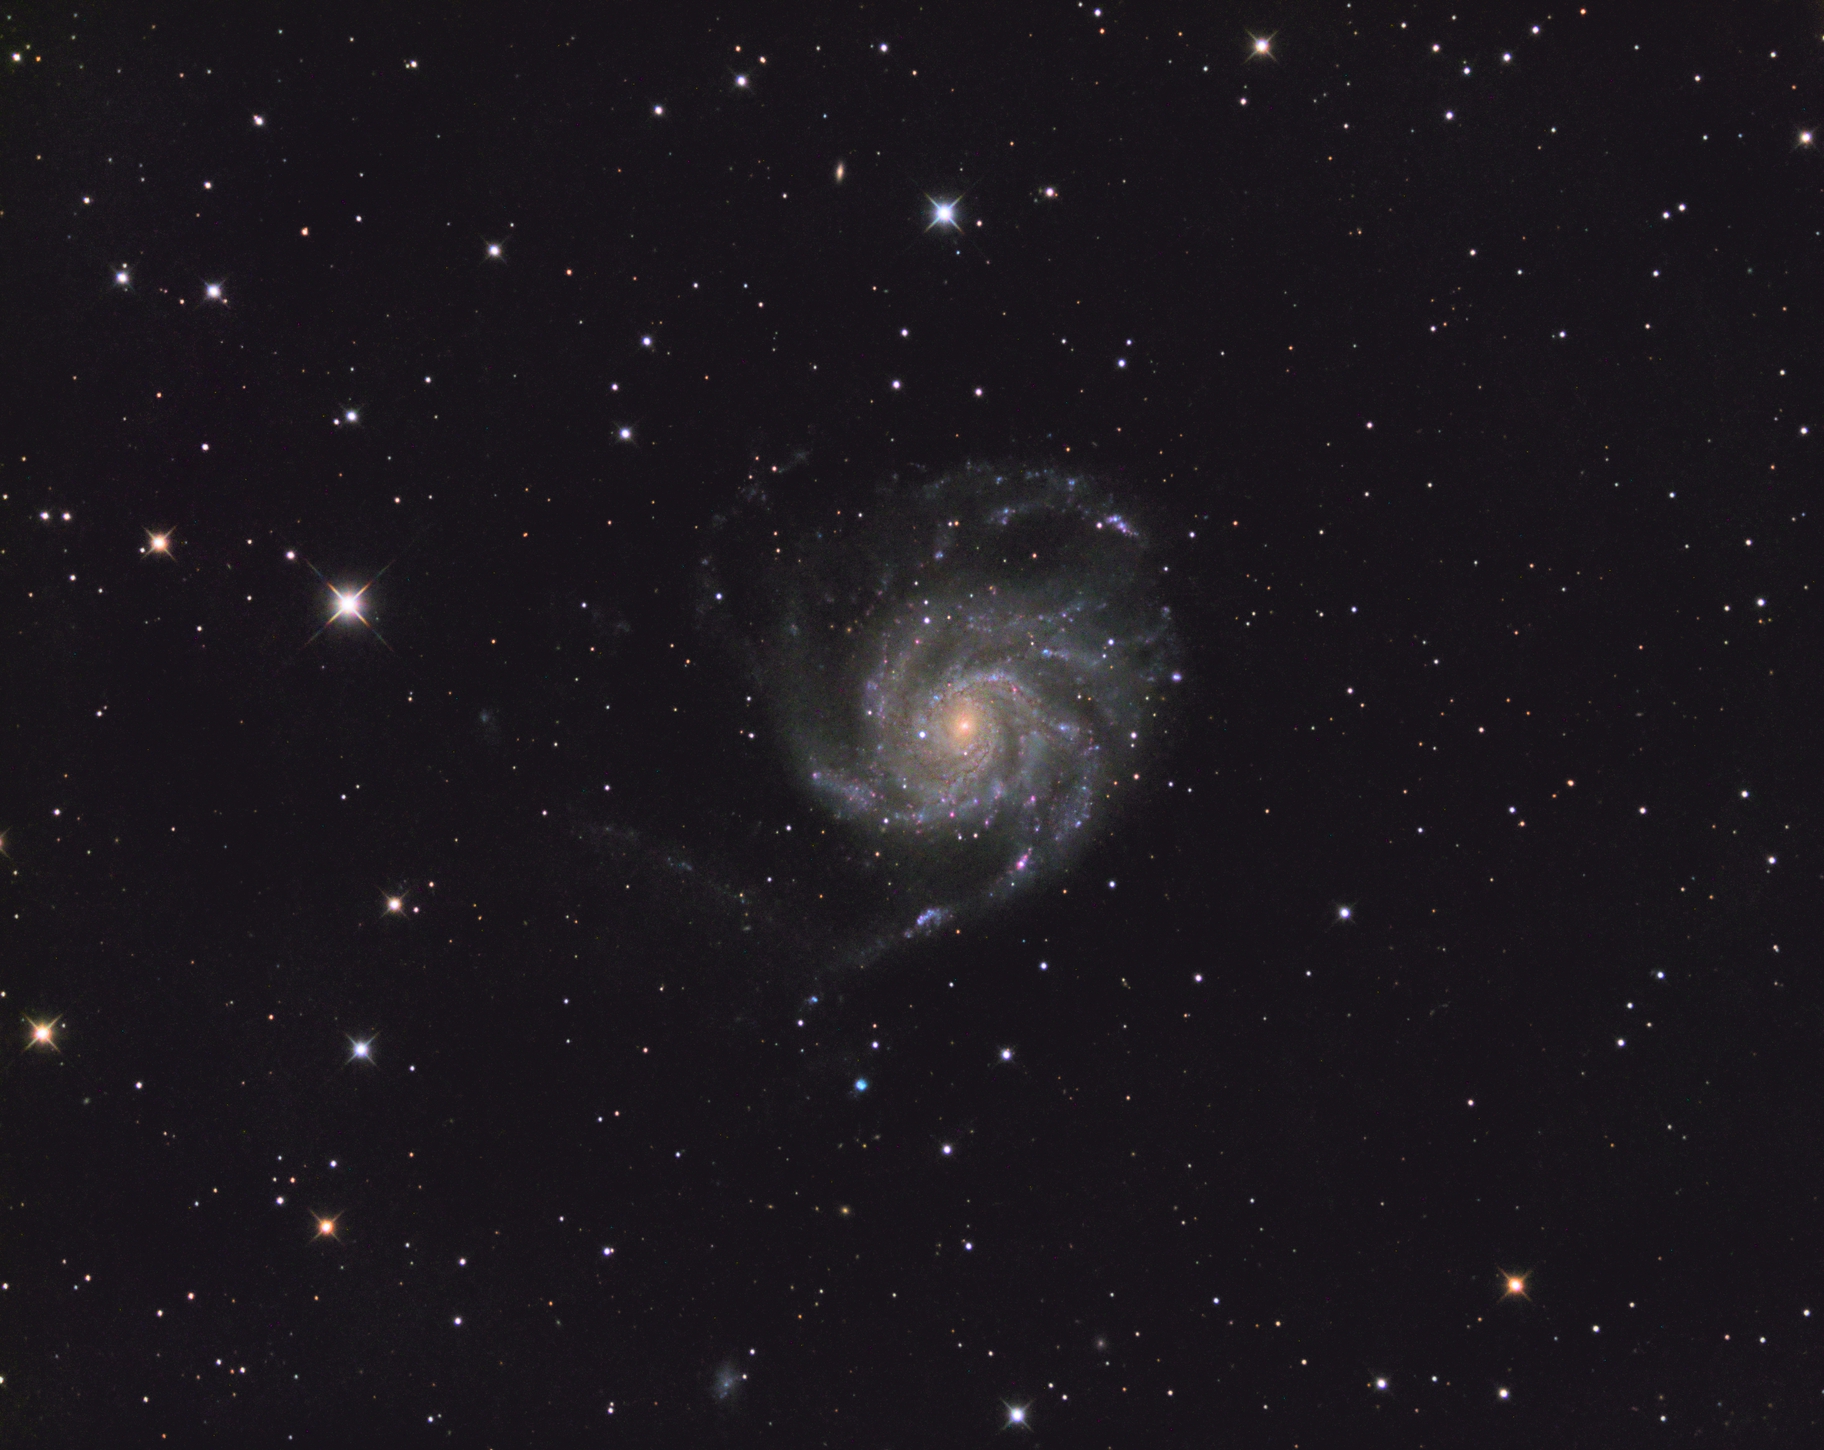
The final image of M101 taken during this session that I captured the above screens from. This was actually 17 hours done over three imaging sessions.
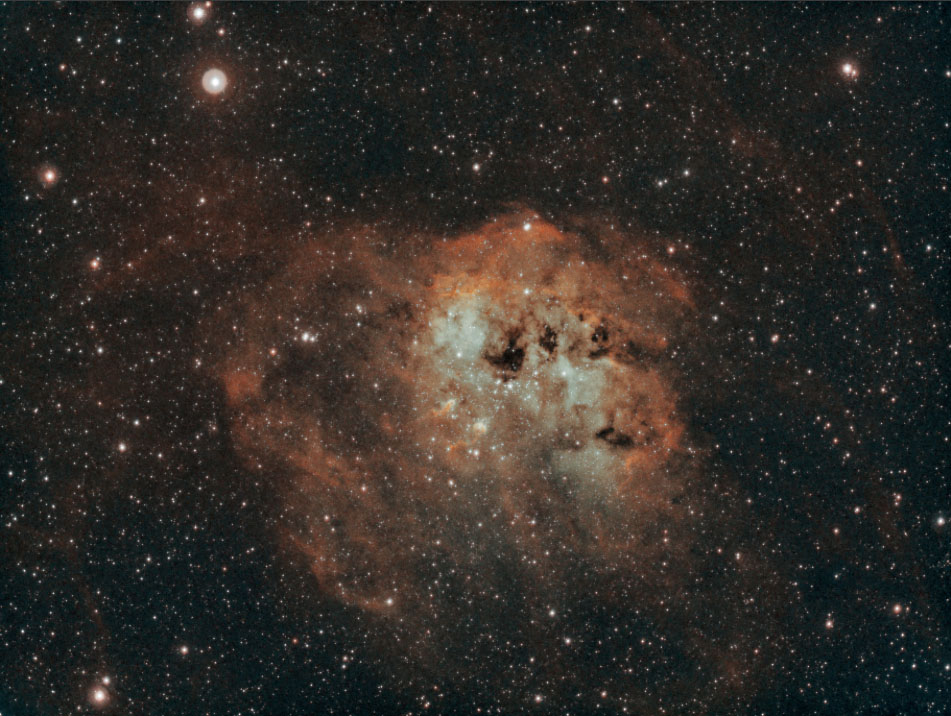
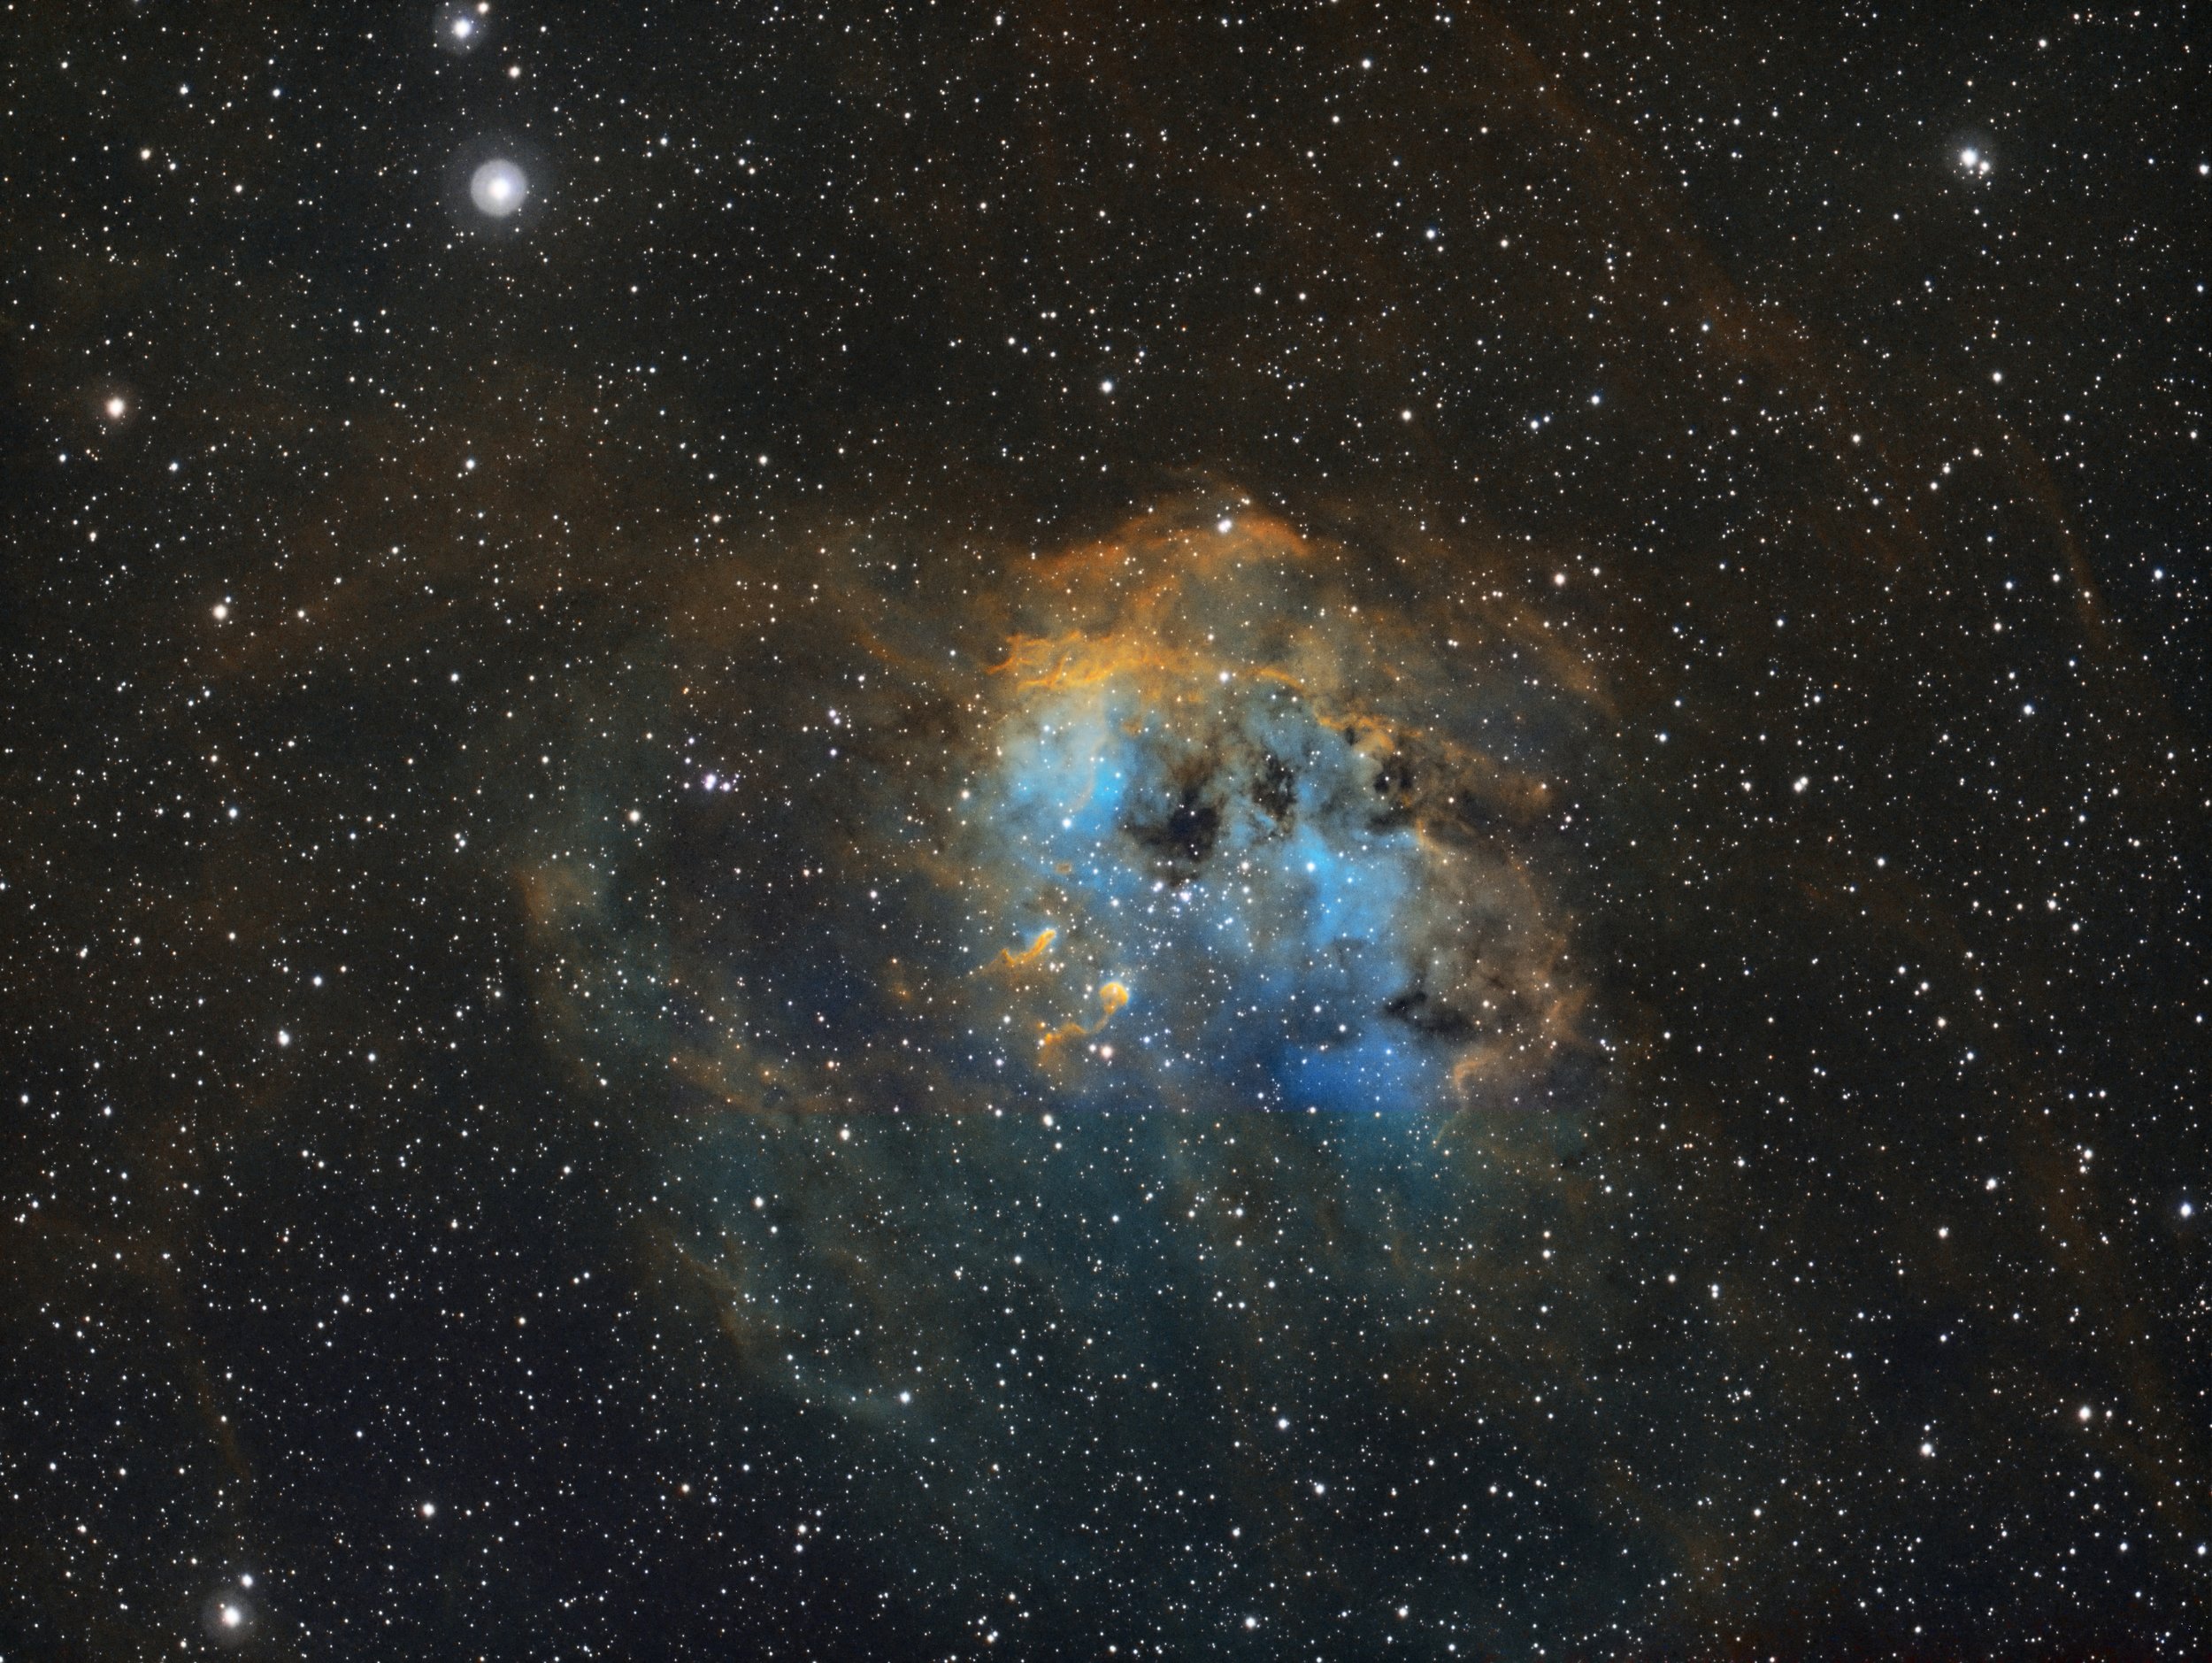
I imaged IC410 over a single night using my Explore Scientific 102mm FCD-100 telescope, ASI1600MM-Cool camera, and the ZWO narrowband filters. I took 75 images that were exposed for 5 minutes each. 25 HA, 25 OIII, and 25 SII images in total.
I used AstroPixel Processor to combine and integrate the images into a single master HA, OIII, and SII frame. From there I imported all three into PixInsight and followed this Light Vortex Astronomy tutorial for processing the individual frames. Note that their tutorial covers a two frame process, and I had three. I just applied the same processing techniques to each of my three frames.
Where I had to diverge from the above tutorial was when combining the images into a single color RGB image. I researched and found the following PixelMath formula for PixInsight to combine the 3 frames:
R: 0.5*SII + 0.5*HA
G: 0.15*HA + 0.85*OIII
B: OIII
Once done, I wrapped up the tutorial and concluded with the finished image seen above.
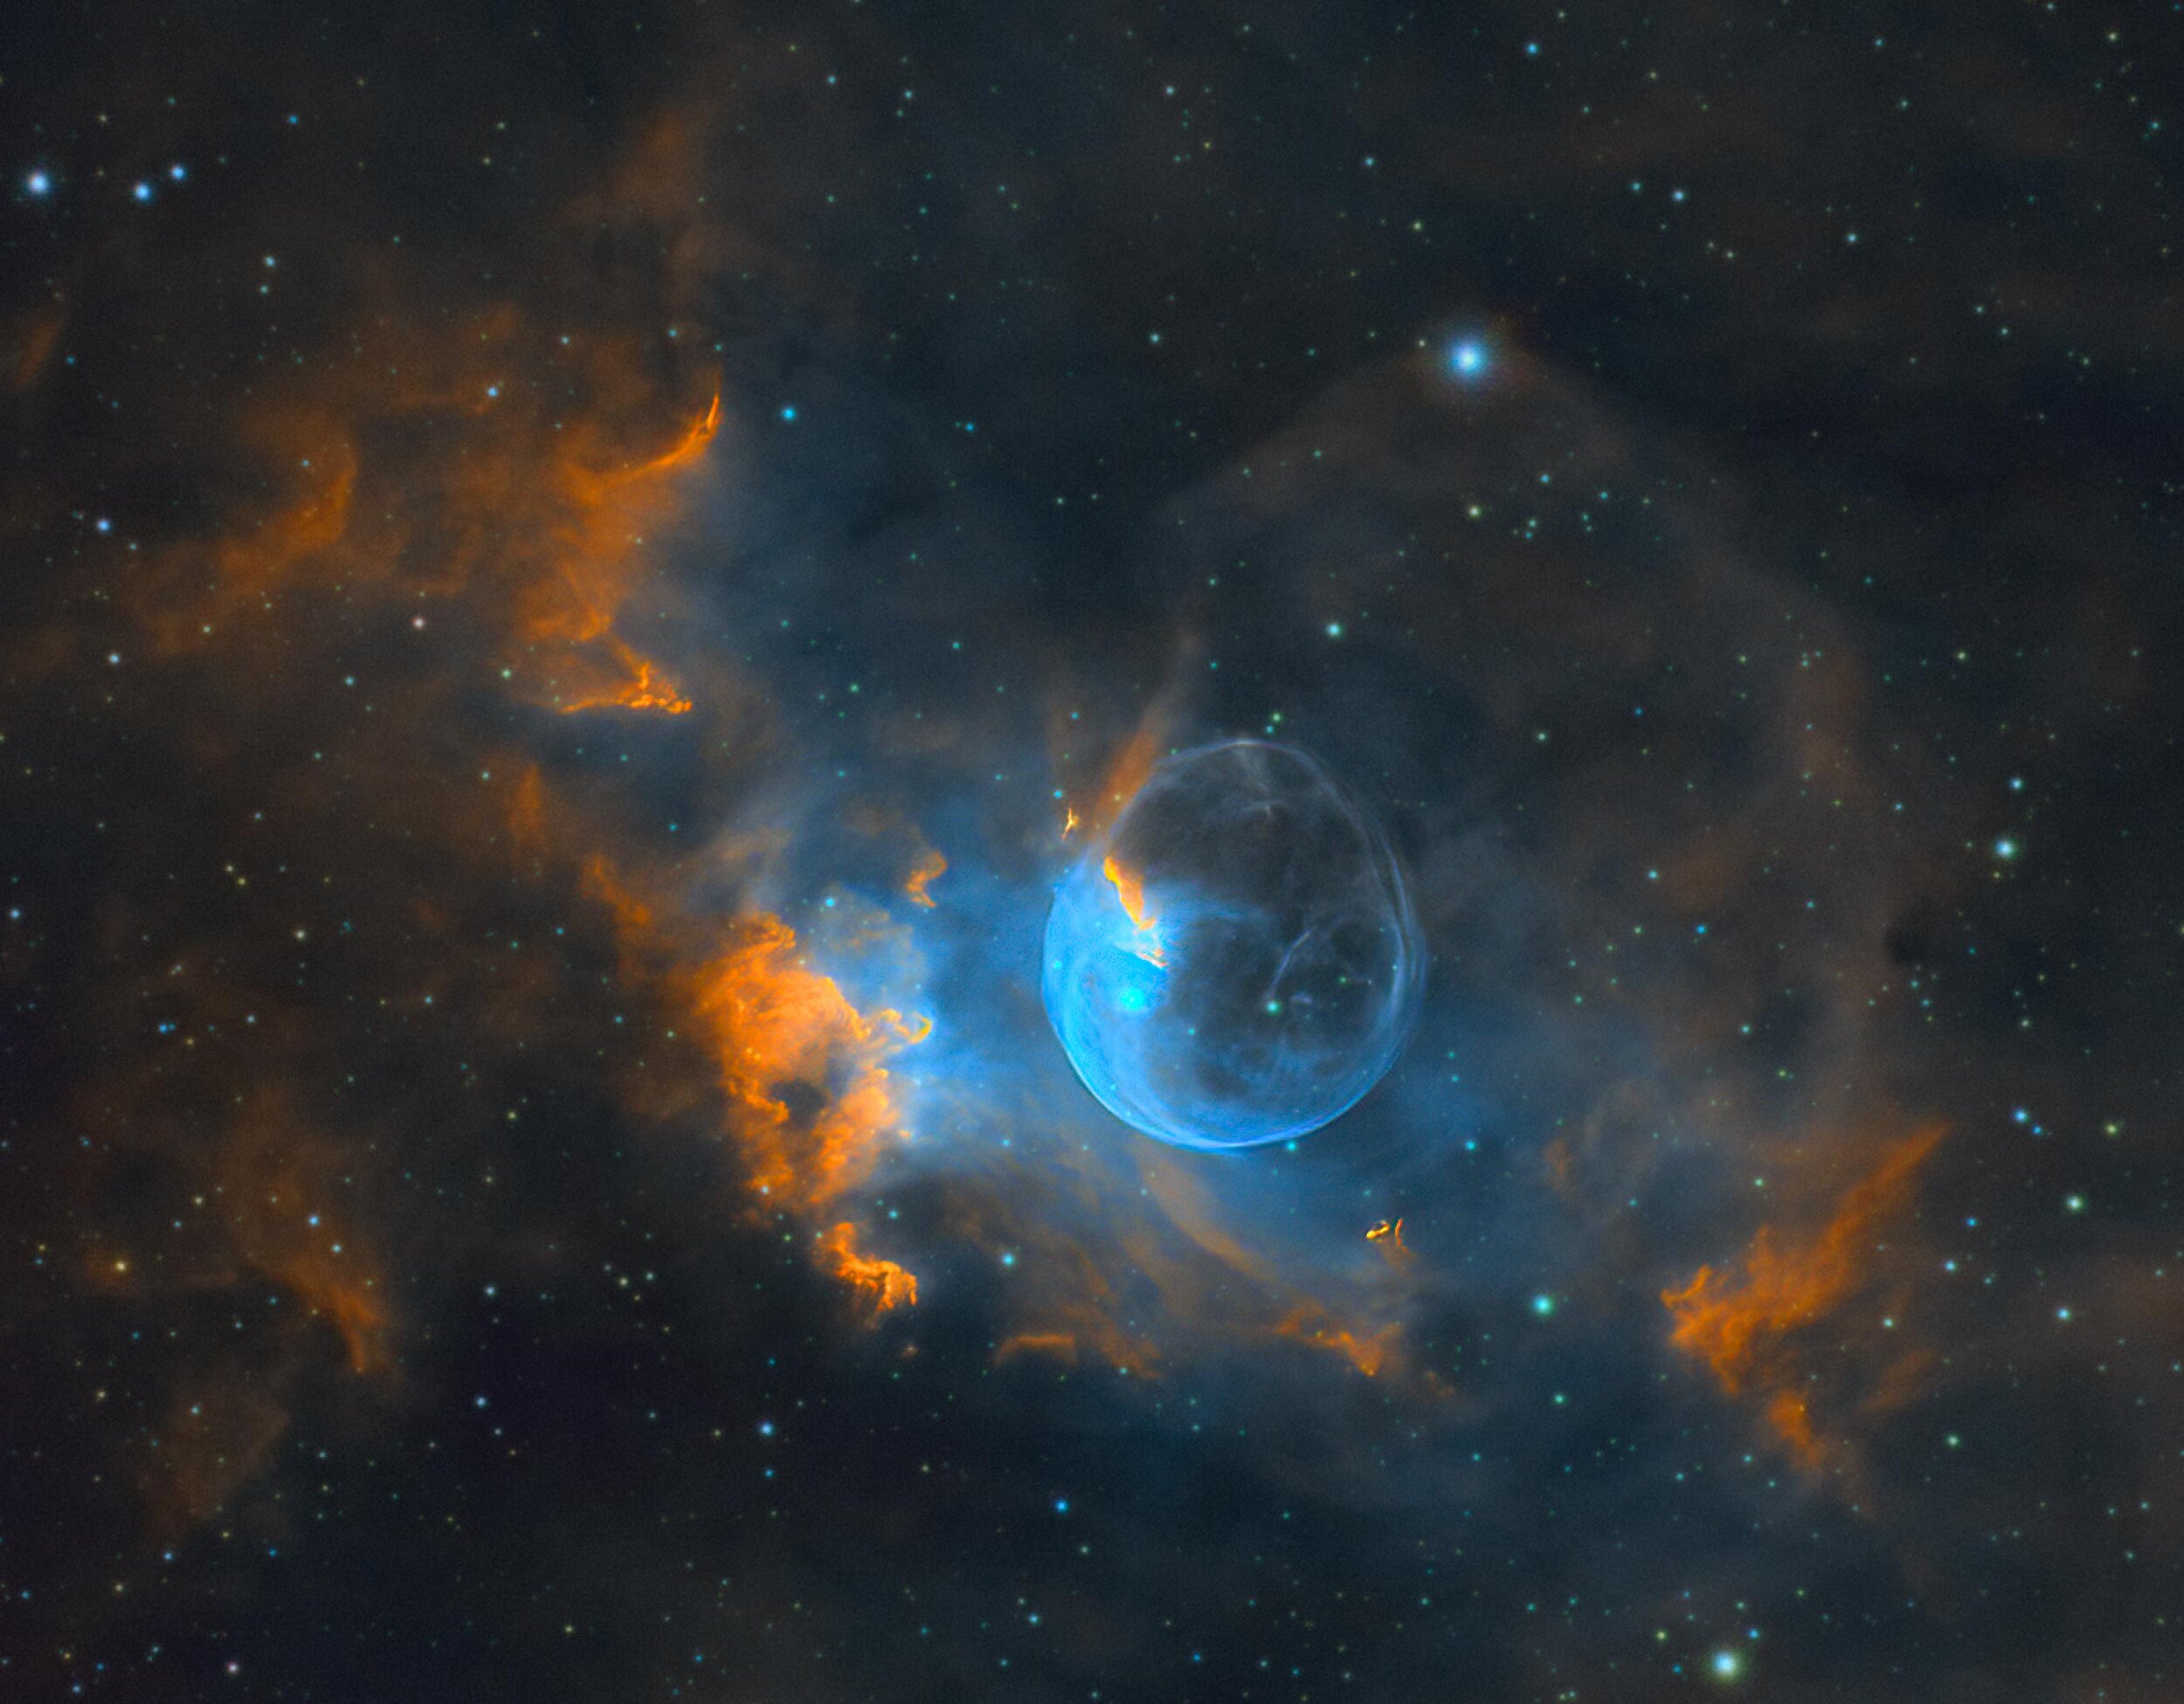
I also went back to this same image and reprocessed it in the Hubble telescope pallet.