I cover the ins, outs, and controversies of using Topaz Denoise AI in your astrophotography images.
Astronomy and astrophotography planning with AstroPlanner on the Mac
Overview of AstroPlanner
AstroPlanner is a complete system for tracking observations and planning out nightly viewing or imaging sessions with your equipment. It also offers computer scope control from within the application.
Upon launching the software you'll need to start populating it with your user information. You'll provide your observing locations, this can contain your current location, as well as offsite locations that you visit for observing. AstroPlanner can access a USB GPS device to give you pinpoint accuracy for your site location. This should allow you to plan for those remote visits before you travel, so that you can be prepared with the equipment you require for the objects you plan on viewing or imaging.
The filter resource. (Add your filters here on this tab, and AstroPlanner will show you the visible wavelengths your an view or image with.
In addition to your location, you can add each telescope you own, any eye pieces you have, optical aids like Barlows or reducers, camera or viewing filters, the observer (yourself or a buddy who might observe with you), and any cameras you might utilize for imaging.
Once you've added all your equipment, you can start to add objects to the observing list. There are four primary tabs for objects. The objects list, the observations tab to add observations, the field of view tab which shows you how your image will look using the selected equipment, and finally the sky tab which shows the nights sky chart and allows you to view where the object you selected lies in the night sky, as well as other objects that are visible.
The Objects view in Astro Planner
This is the main view within AstroPlanner. From here you add objects by using the Plus symbol in the lower left corner fo the screen. You get a search function to find the object and add it to the list. You an also browse by what is visible currently in the sky, and filter those choices by object type (open cluster, galaxy, nebula, planetary nebula, etc.). Across the top of your screen, you get a readout for the current date and time, sidereal time, Julian date, GMT, and GMST. On the second row below that information you can select the telescope you intend to view your object with. Next to that, you can see the sun and twilight time, what the current moon looks like, as it's helpful to know how much of an impact the brightness of the moon will have with imaging. Then next to that is your site location, and a clock which you can set to show the object at different time intervals.
On the next row of information you see the ephemeris of the object during the night and month. This allows you to see the objects elevation during the darkest part of the night between sundown and sunrise and it's visibility over the month. Next you see see altitude and azimuth indicators from due north. This gives you an idea of how you will need to point your telescope to see the object, in the above image it's indicating you need to point east and slightly above the horizon. Lastly there is a tiny indicator of where the object is in the night sky.
At the bottom of the screen you see your object list, as well as the local sky chart (showing the object constellation where your object is. You can switch the sky constellation chart to show images from several astronomical databases like the Hubble Space Telescope raw images.
The Observations view in AstroPlanner
This tab highlights observations for the currently selected object. From here you can put in seeing and transparency conditions, note your field of view, and add any observations you made of the object during this particular time and date.
Additionally, you can add attachments to your observations. In this case, I added an image I took with my telescope of NGC7000. I left an observation note listing out the focal length and equipment I used for this session.
Field of view in AstroPlanner
This tab allows you to select all of your equipment for the viewing session. In this particular instance you can see I picked the AT6RC scope, with a CCDT67 reducer, and the TeleVue Delos 4.5 eye piece. With the current object M33 selected, and a Hubble Space Telescope image loaded, I'm able to see what it would look like in my telescope's view had I been looking through that particular set of equipment. You can choose additional display options in the lower right hand corner and it will overall known stars, object names, etc into the view.
The Sky view in AstroPlanner
In this final object view screen, the Sky tab, you can see a sky chart of where your object is in the night sky. You can turn on and off planets, stars, galaxies, etc using the display options to the right to fine tune the view and make it easier for you to spot your object in the night sky.
I hope this gives you a good indication of the use and benefit of having a detailed planning tool. AstroPlanner is available here and is priced at $45, which doesn't seem like that much for all the features that it offers.
An Overview of Double Stars on the iPhone
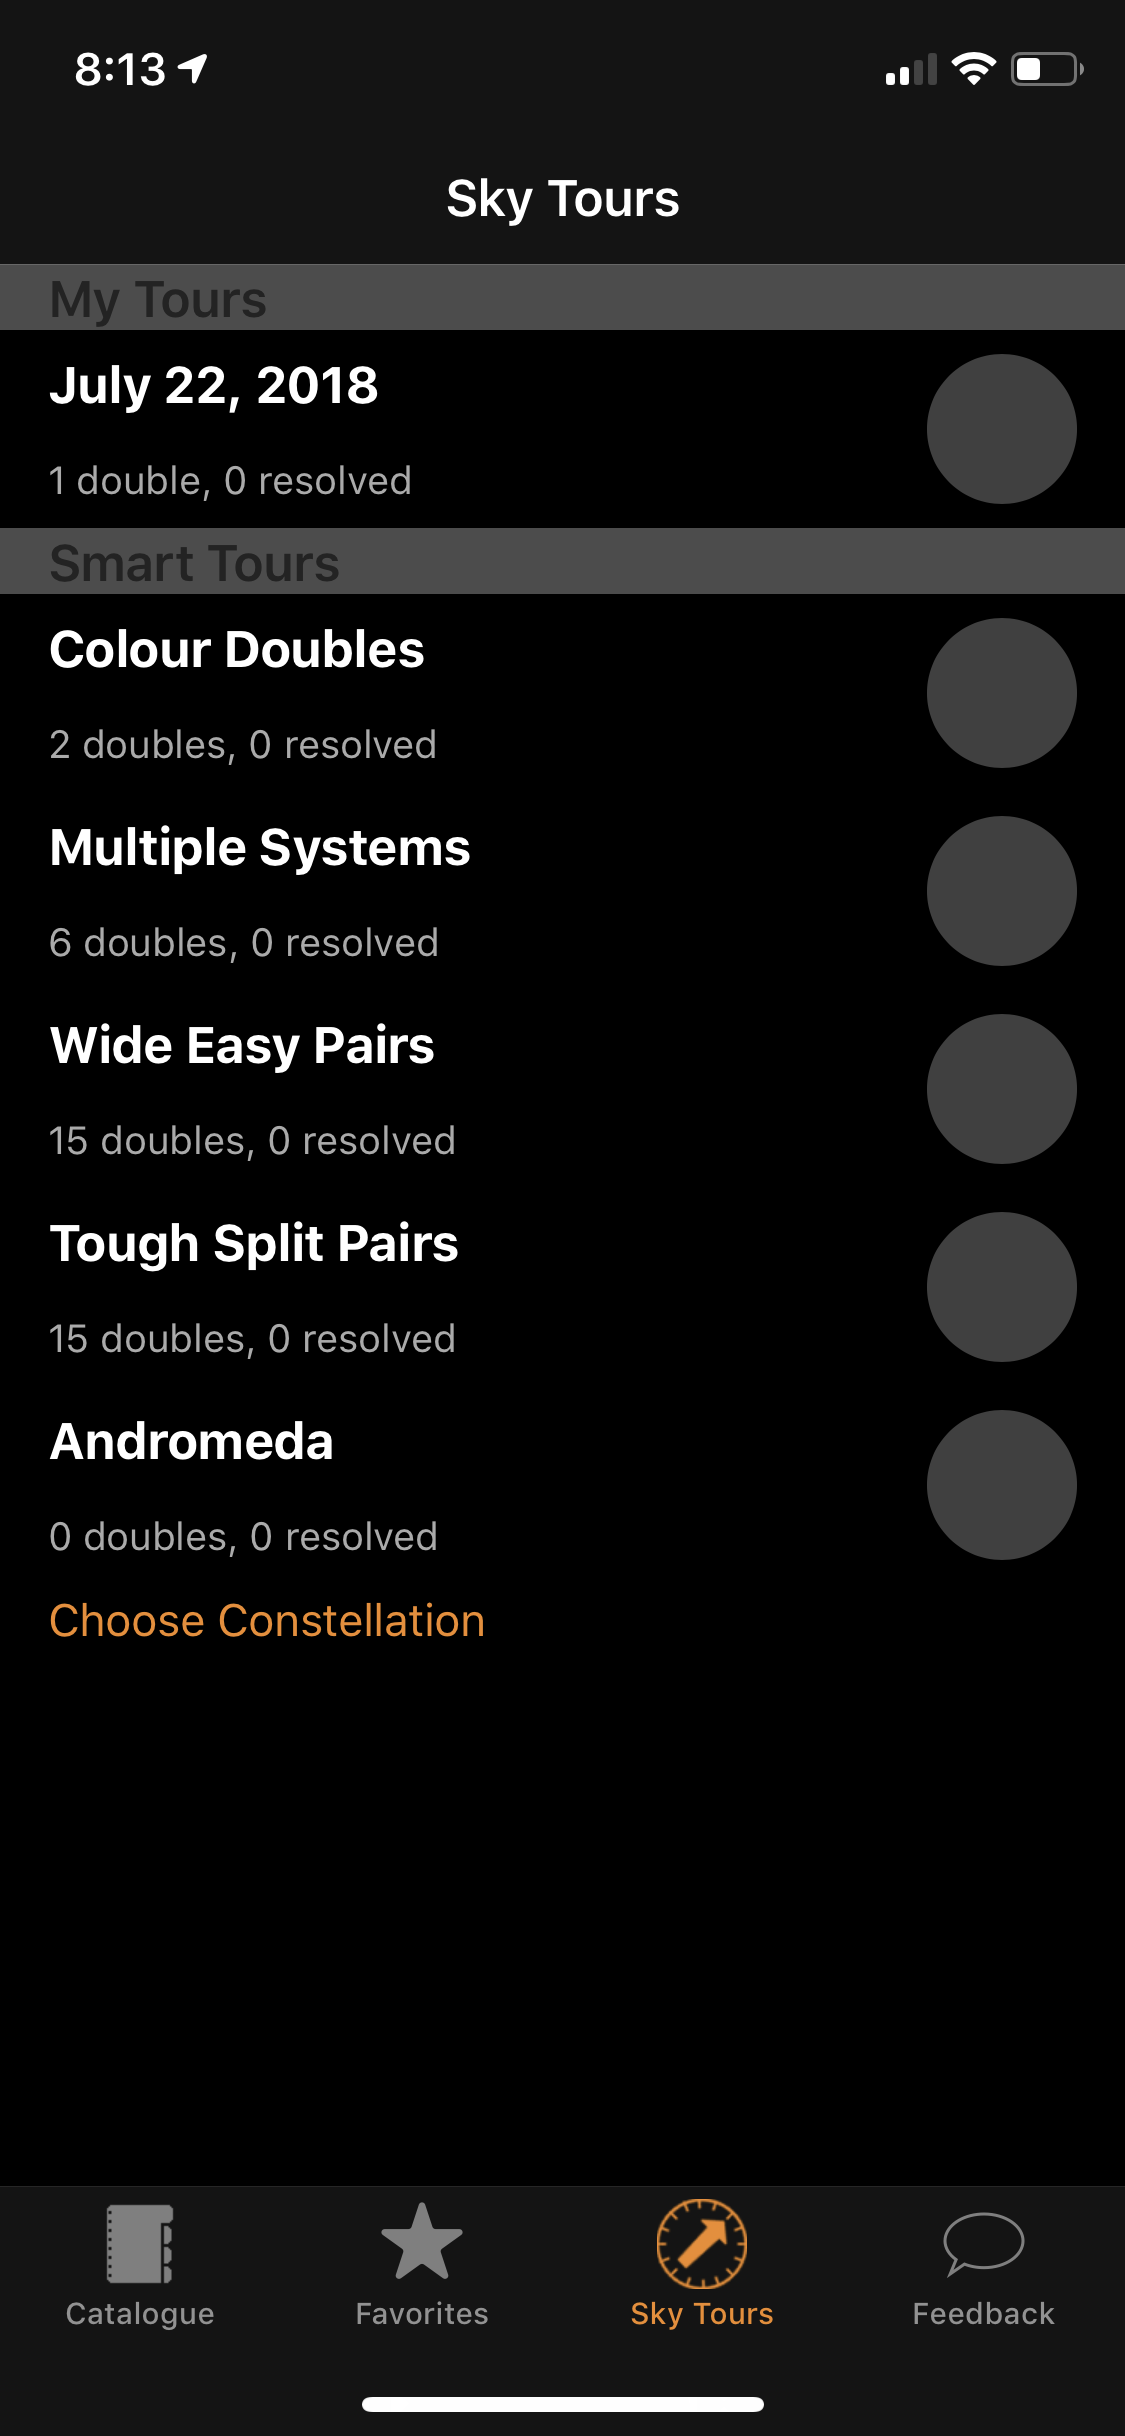
Here's another well done, simple, and focused astronomy application that's been recently added to the App Store. Double Stars, as it's name implies is a quick way to look up and keep track of your double star viewing. What makes this app so special is that you can go on a Sky Tour of the night sky. Double Stars points out the best double stars that are visible from your location, and sets you up with challenges to see if you can split (magnify the stars enough so that they appear as the two stars that they really are) the nights doubles.
The sky tour has a nice location assistant feature which uses your phones gyroscope and GPS to locate your position, and let you rotate around and to the correct altitude to easily find the star pair.
This handy application can be a lot of fun at a star gazing party, or right in your back yard. Mark your favorite double stars, and mark if you were able to split them with your equipment. It can be downloaded through the iPhone App Store.
An Overview of MeteorActive on the iPhone
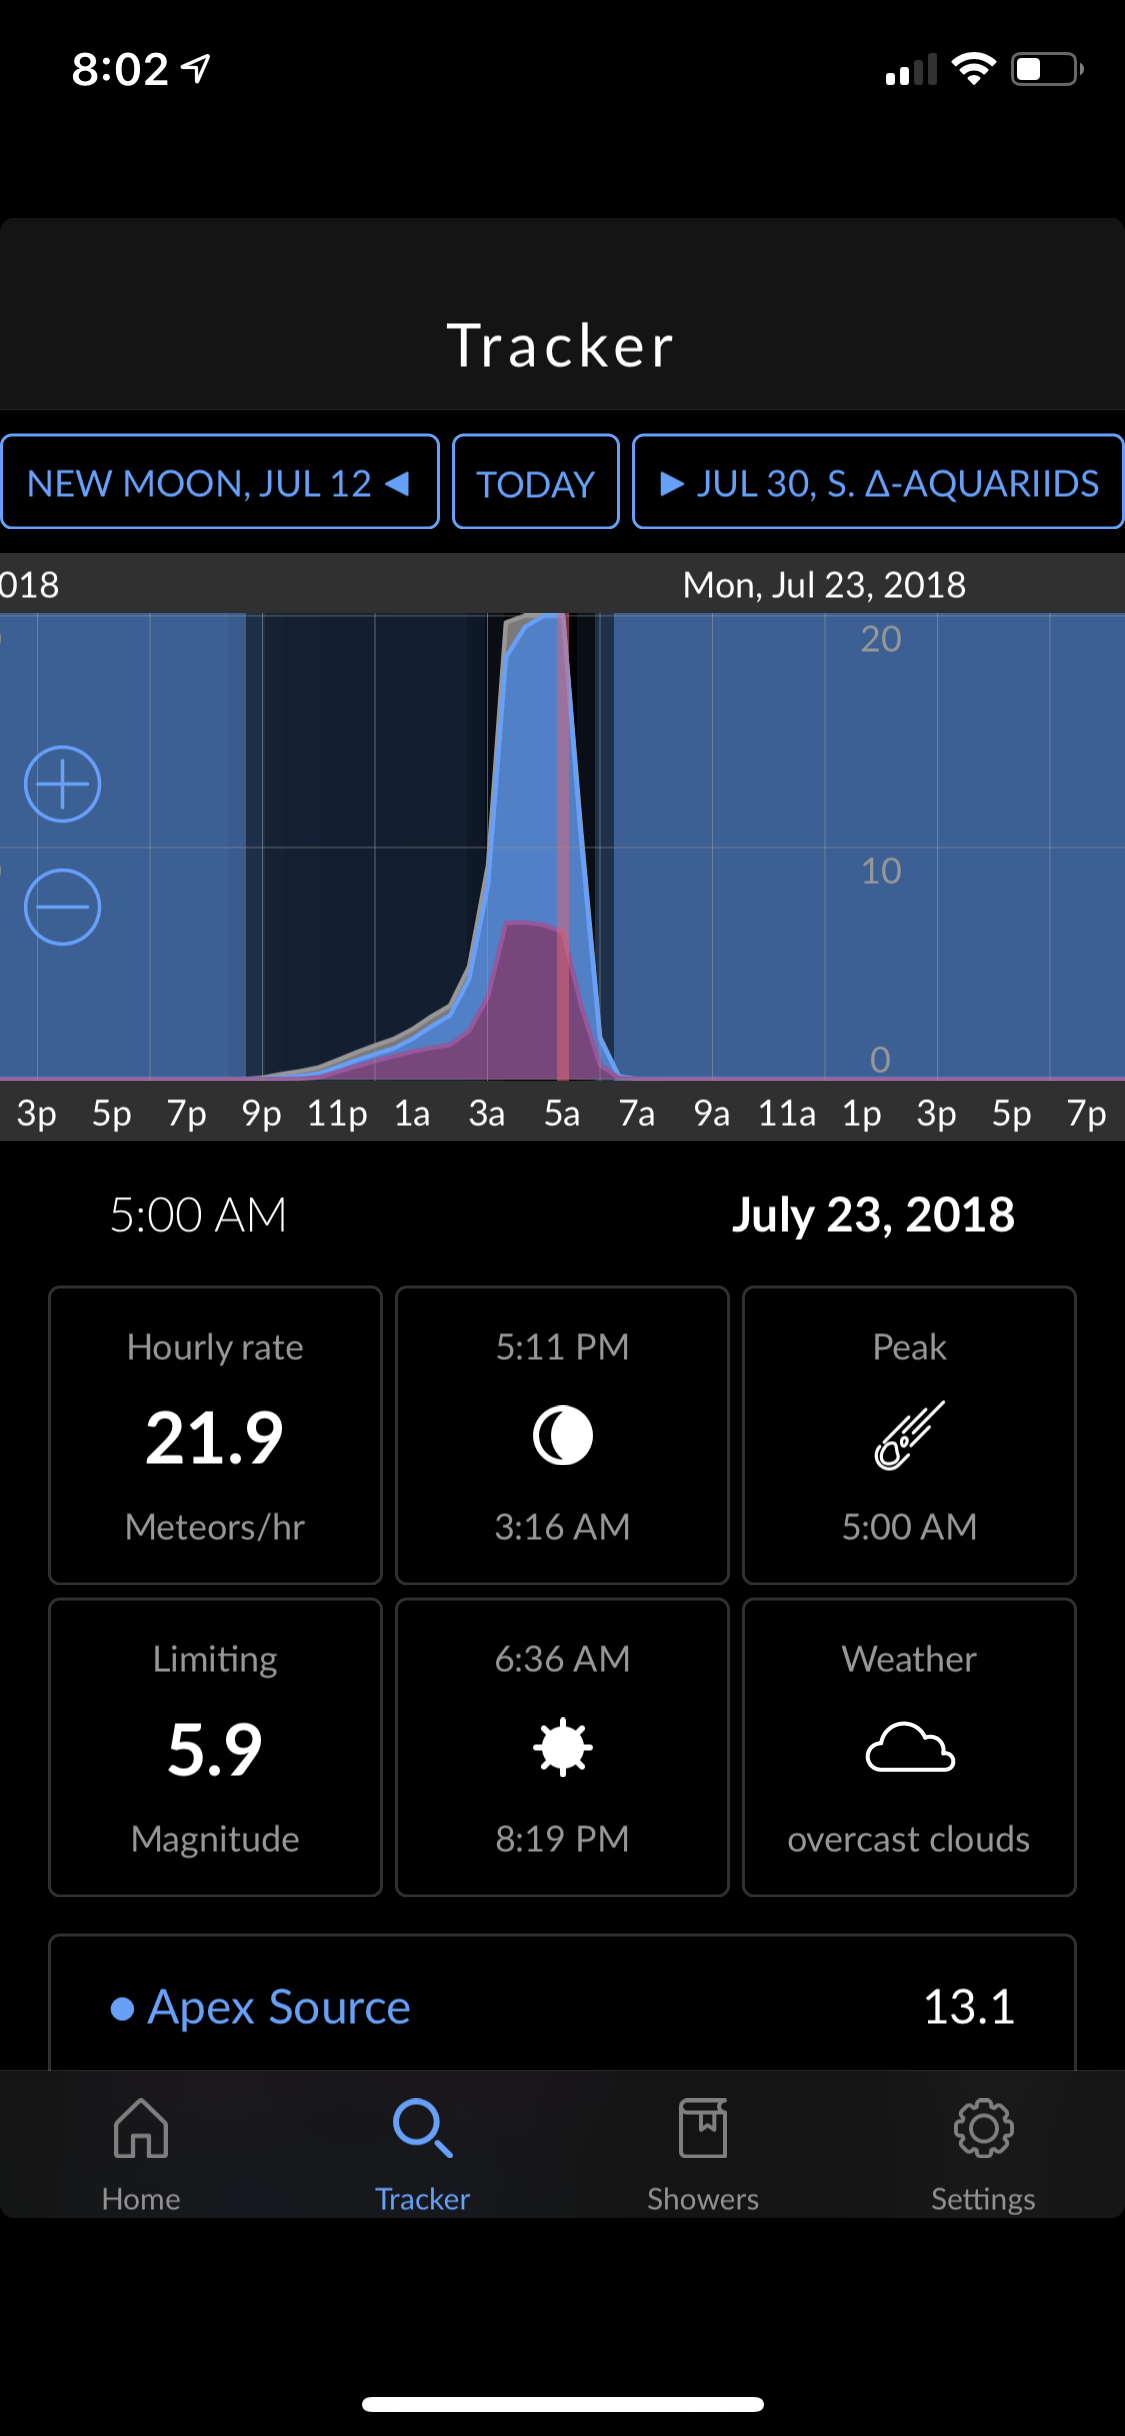
MeteorActive is a great way to stay on top of all the meteor showers headed your way. The iPhone application is very straight forward in it's premise. Detailing major and minor events, and listing them in date order allowing you to see how many meteors to expect on a per hour basis. I had no idea there were this many going on. Detail views of each meteor shower allow you to see the best viewing times during the evening sky, and during which hour they will peak. Every astronomer should have this app handy. It's available on the iPhone App Store and can be downloaded through this link.
An overview of Observer Pro on the iPhone
Observer pro is really an invaluable application to use for choosing targets in the night sky. It contains objects from all the large catalogs Messier, Caldwell, Herschel, NGC, and IC. You can also browse objects by type including Galaxies, Galactic Nebulae, Planetary Nebulae, Open Clusters, and Globular Clusters. The above views show the listing view and object view. In the listing view you can see the objects visibility during the 24 hour period. It's depicted by an orange/green bar. The best viewable time for that object is depicted in Green. Bright blue depicts day, dark blue depicts moon light, and black is no moon during the night.
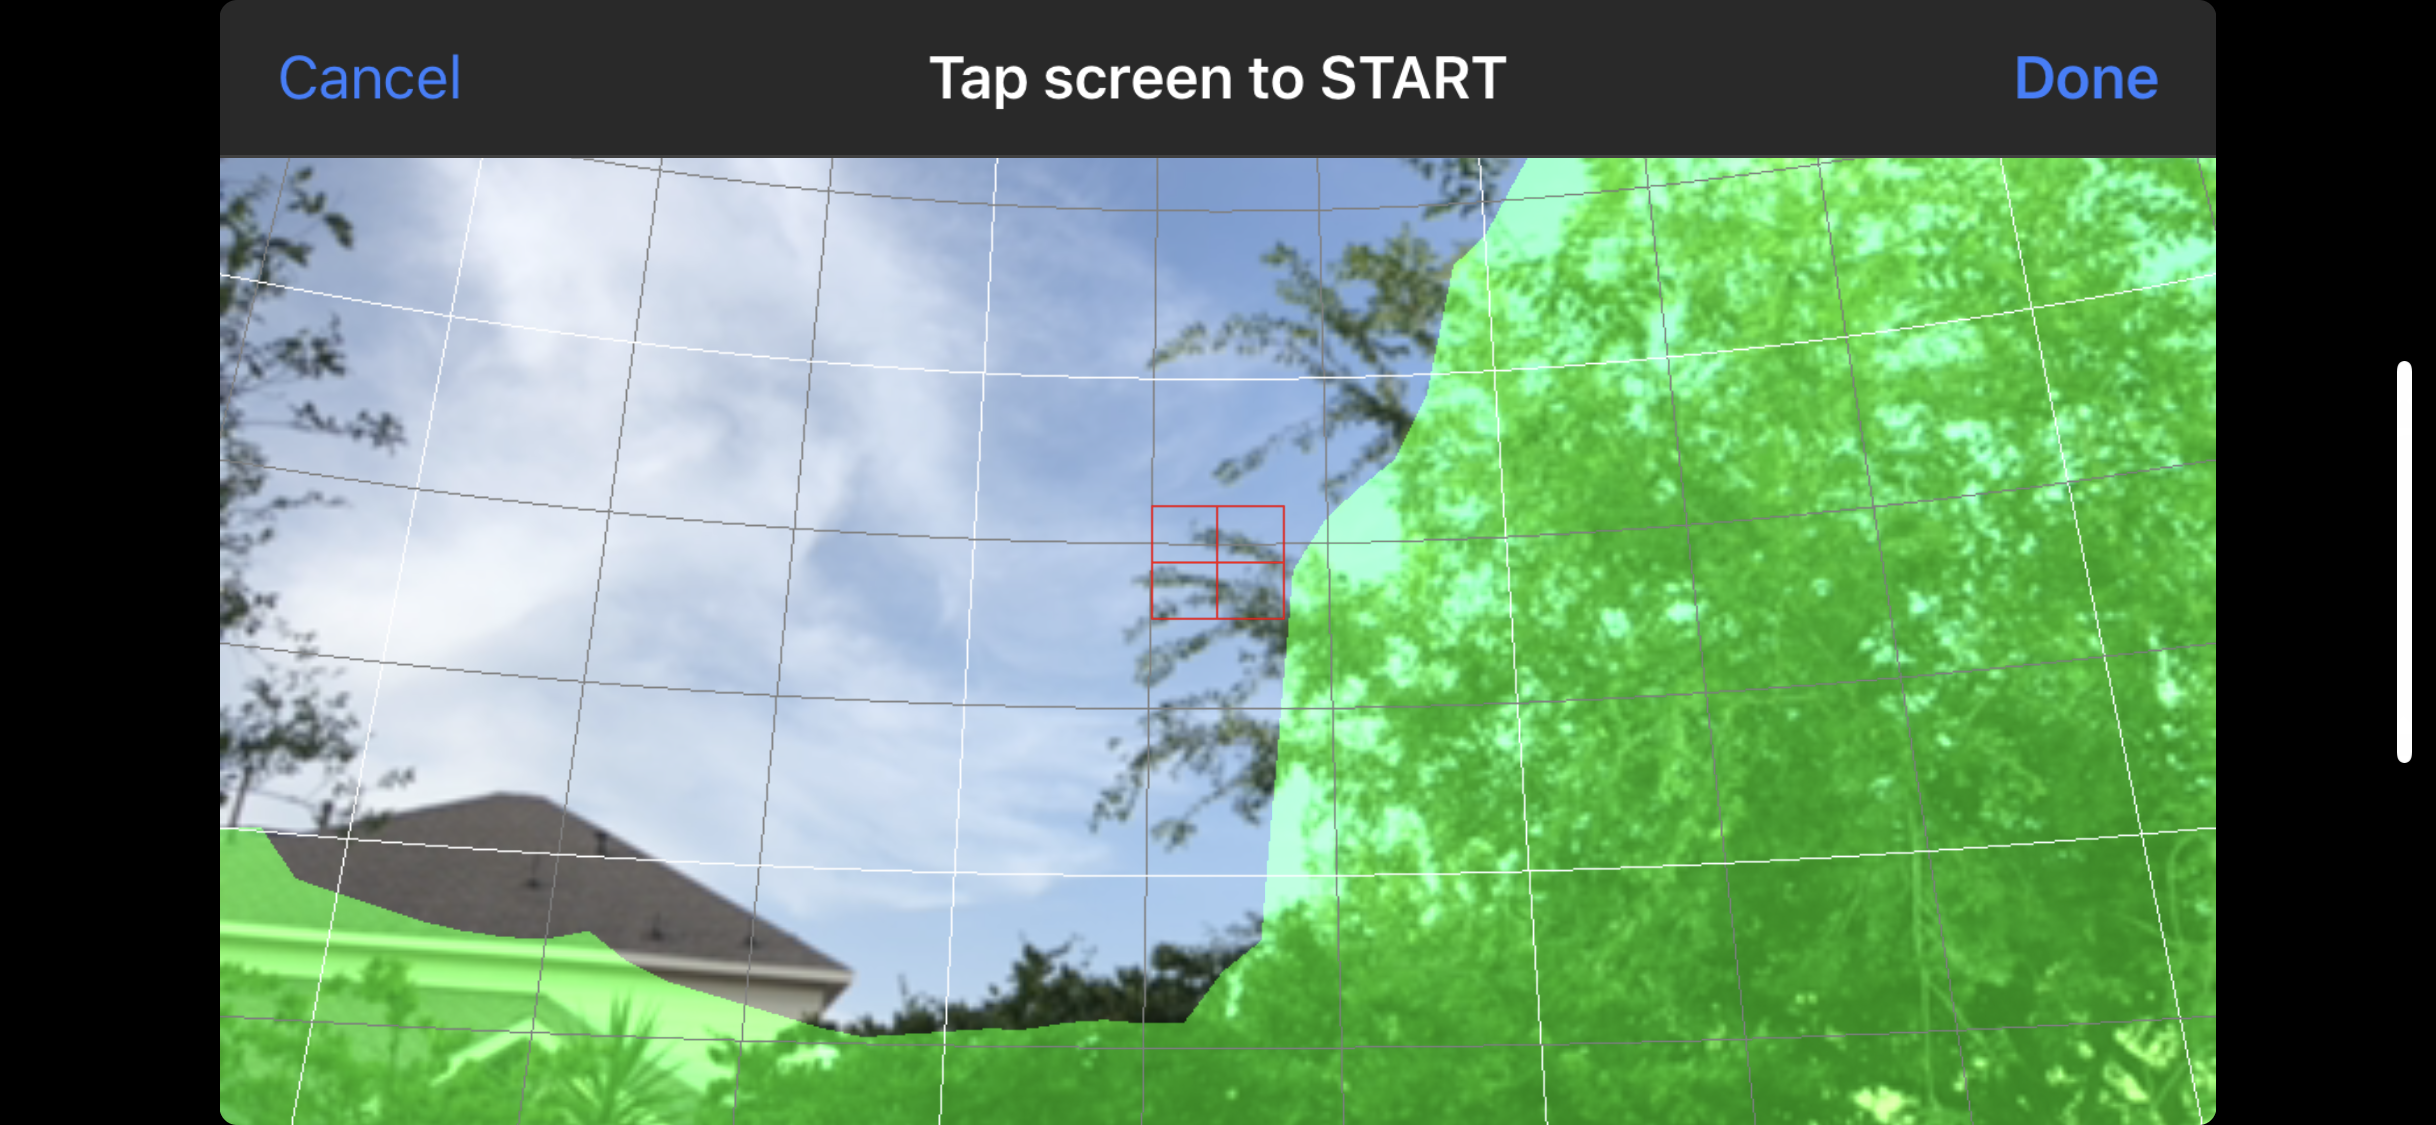
You'll notice some gaps in the orange/green bars shown above and that's because I have my local horizon measured in the application. The application uses mixed reality to view through your phone camera and trace the horizon of your sky (in this case, my back yard, which has several large trees that block my view).
It's best to position yourself where your telescope would be, then use your phone as a viewfinder and draw your local horizon tracing any objects that might be in the way. The result should show something similar to the above. Once done and saved, you can turn on local horizon, and have it show when objects go behind obstacles in your horizon.
These views depict where the object is during the night sky, and show a finder view to help you see what the sky and object location look like with no obstructions. Other views depict detail of each chart available to each object, as well as detailed information on each object.
Detail view showing the rise and set of the sun and moon, as well as the object rise and set time, and depicted in green is the best available time for imaging with no moon.
This view shows detailed information on the object, including it's magnitude, location, and what type of object it is.
To top it all off, you can export your local horizon out of the application and convert it to a horizon file for use in Sky Safari. I have my local horizon loaded into Sky Safari 6 Pro on both my iPhone and my Mac desktop computer.
Here's my local horizon file loaded into Sky Safari 6 Pro. To export your horizon file, you must download a converter program (from Joshua Bury the creator of Observer Pro), and also download a script to run the converter from Processing.org, it will take your horizon file and output a PNG that can be imported into Sky Safari.
I highly recommend Observer Pro to anyone that owns an iPhone. It's an invaluable resource that allows for easily scanning the objects lists to see what's visible during the night sky. It also has a handy night mode for use in the field.
An Overview of EKOS Astrophotography Suite on the Mac
This is the main EKOS window. On the left are tabs that represent different sections of the application.
EKOS is the capture suite that comes as part of the KStars Observatory software package. It's a free, fully automated suite for capturing on Mac, Linux, and PC. It's not to dissimilar to Sequence Guider Pro on the PC. While the capture suite comes with KStars, you're not limited to using KStars. EKOS will also allow you to send commands to your mount from SkySafari on the Mac as well.
I'll break down it's use and capabilities screen by screen.
Main Window
In the main window shown above, you see tabs that represent each part of the application which include the Scheduler, Mount Control, Capture Module, Alignment Module, Focus Module, and Guide Module. From the main window you will see the currently taken image, the seconds remaining in the next image, as well as which image number you are on during the sequence, and the percent complete of the entire sequence with hours, minutes, and second remaining in your sequence. Additionally to the right of your image, you see your target and tracking status, focus status, and guiding status.
Scheduler
This is the Scheduler window, where you can pick your targets, and assign capturing sequences to them.
From the Scheduler, you can pick your targets, and assign them capture sequences (which are set up in the imaging module). Additionally there are some overall parameters you can set here for starting a session and ending a session. If you have a permanent observatory, you do things here like open and close your observatory with startup and shut down sequences, or set parameters for when to run your schedule based on the twilight hour, weather, or phase of the moon. The scheduler lets you set up multiple imaging sessions, mosaics, and more. And as the twilight hour approaches, it will start up and pickup imaging based off of priorities you set, or object priorities based on their visibility in the night sky. Imaging sessions can be set for a single night, or can be taken over multiple nights if it wasn't able to complete them in a single night.
Mount Control
Mount control is fairly straight forward. This window shows the current aperture and focal length of your selected equipment. You can save multiple equipment configurations from this window for various telescope and guide scope combinations that you might have. Current tracking information is also shown in this window. If you select Mount Control in the upper right of the screen, it pops up a floating window with arrow buttons, speed and goto functions for manually controlling the mount. You can search for a target, and manually go to an object in the sky to start an imaging session without setting one up in the scheduler.
Capture Module
From here you control all aspects of your imaging camera including setting up imaging sequences. For instance, I might have 7 hours of night time to image before the sun rises. I can divide that time up between each filter, and save the sequence of 120 captures, at 60s each at -20°C for each individual filter, and save that as a sequence which I can later load and reuse anytime I want to run that session during a 7 hour window. Or I could say I want 20 hours total on an object, and set all parameters for each filter to accommodate a 20 hour session, and save it. Or maybe I want one session for LRGB, and one for narrowband imaging. You can also set flat, dark and bias sequences. Flats have an awesome automatic mode, where you can set a pre-determined ADU value, and it will expose each filter automatically to the same ADU and capture all your flats in a single automatic session. It also supports hardware like the FlipFlat so that flat sessions can be run immediately following a nights imaging session. Additionally you can set guiding and focus limits for imaging sessions, and control when your meridian flip occurs.
Focus Module
Here you can control all focus functions if you have a computer controlled focuser. I highly recommend getting one of these. Focusing can be set up to run automatically. It will capture a single image, and auto select a star, then run a sequence where it continues to capture, while moving the focuser in and out. Each time it is graphing the HFR on a curve plot trying to find the best point of focus. Depending on seeing conditions, it can get focusing down in 3-4 iterations, or sometimes 20. All parameters including threshold and tolerance settings for focusing are controlled in this window.
Alignment Module
From this window you can polar align (assuming you can see Polaris), and also plate solve to locate an object center window or improve GOTO accuracy. Since I can't see Polaris from my location, I have to use my mounts built in All Star Polar Alignment process, then I can come to this window to capture & solve a target to improve it's GOTO accuracy. There are several nice features accessible here. You can load a fits file from a previous imaging session, it will plate solve the image, then move your telescope to that precise point to continue an imaging session. Or you can select targets from the floating mount control window, then capture and solve, or capture and slew to bring the mount as close to center of the target as possible. EKOS automatically uses this function during an imaging session to initially align to a target, and then realign once the meridian flip occurs.
Guide Module
The guide module handles all guiding through your guide scope and camera. Press capture in the upper left, and hit guide, a star will be automatically selected, calibration starts, and once calibrated guiding begins. Additionally options can be set for dithering, and guide rate. For people who prefer PHD2, EKOS integrates seamlessly with it, and even shows PHD2's guiding graphs within the app and on your overview tab. I've not personally had any issues using the EKOS guiding, and it has an additional benefit of being able to reacquire a guide star after clouds interrupt your imaging session, and can continue the imaging session when it's clear again.
Overall thoughts
As someone who images regularly, and doesn't have a permanent setup (like an observatory), I like how much of the application can automate my nights imaging sessions. There is little else available on the Mac that is this full featured. The Cloudmakers suite comes in a close second for me, but is initially easier to set up and use. Additionally TheSkyX is also a full featured suite, however I've not used it. The setup process with EKOS isn't too difficult once you get an understanding of how the modules interact with each other and what all the options do. I hope this brief overview gives you enough of an idea that you can setup and use the software on your own. EKOS has a healthy number of contributors on the project, and regularly sees updates on a monthly basis, and has good support through it's user forums.
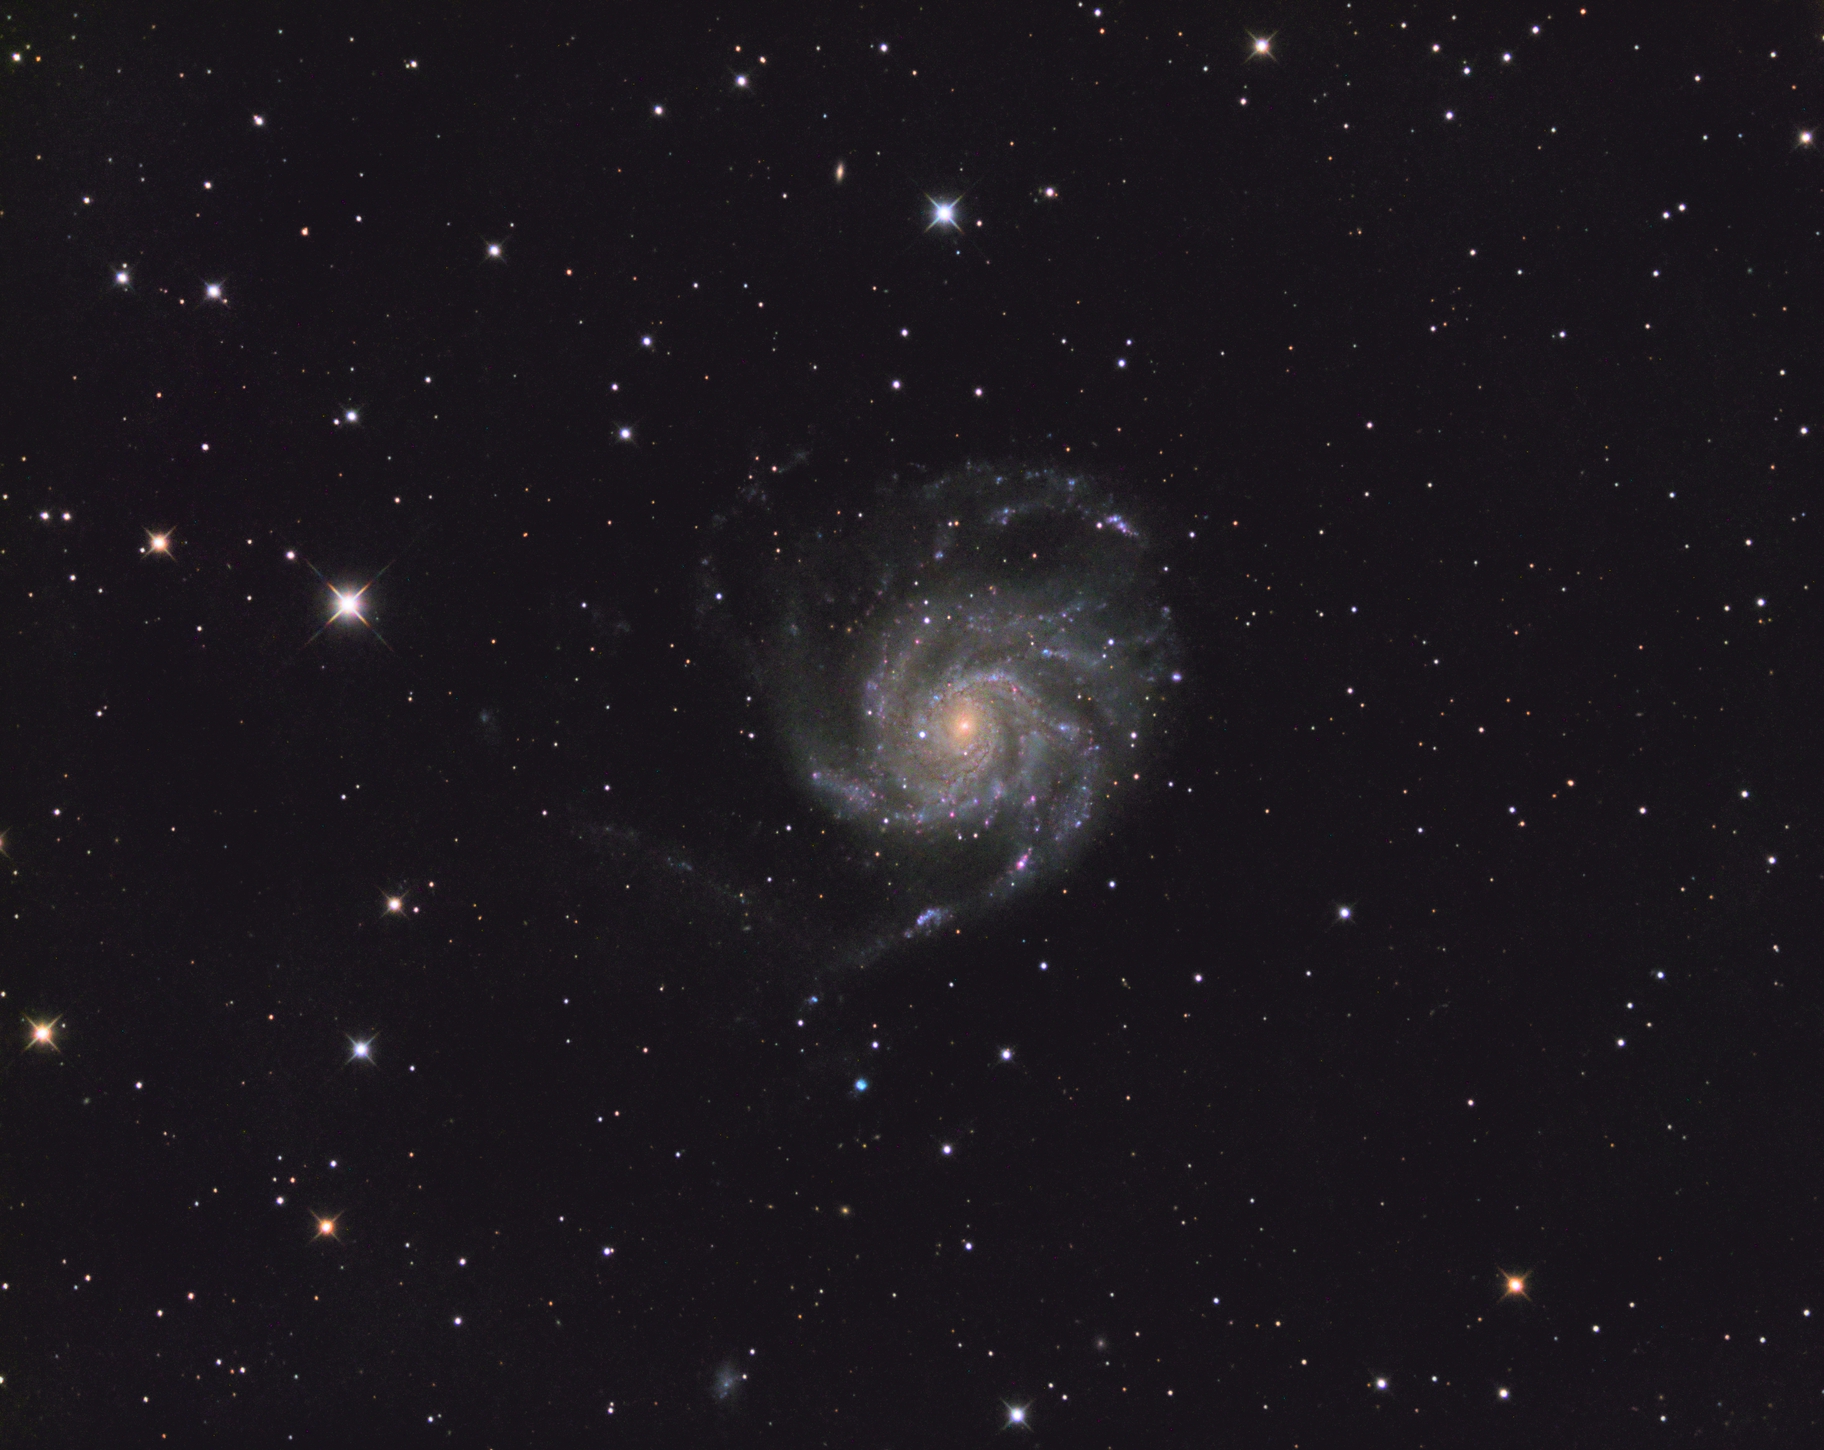
The final image of M101 taken during this session that I captured the above screens from. This was actually 17 hours done over three imaging sessions.
Observatory Astronomy Image Catalog Application for the Mac
What do you do with the organized or unorganized chaos of your astrophotography library of images as you continue to add to it over time? I end up with dozens and dozens of folder within folder sorted by date and object. Well, Observatory has shown that there's a better way.
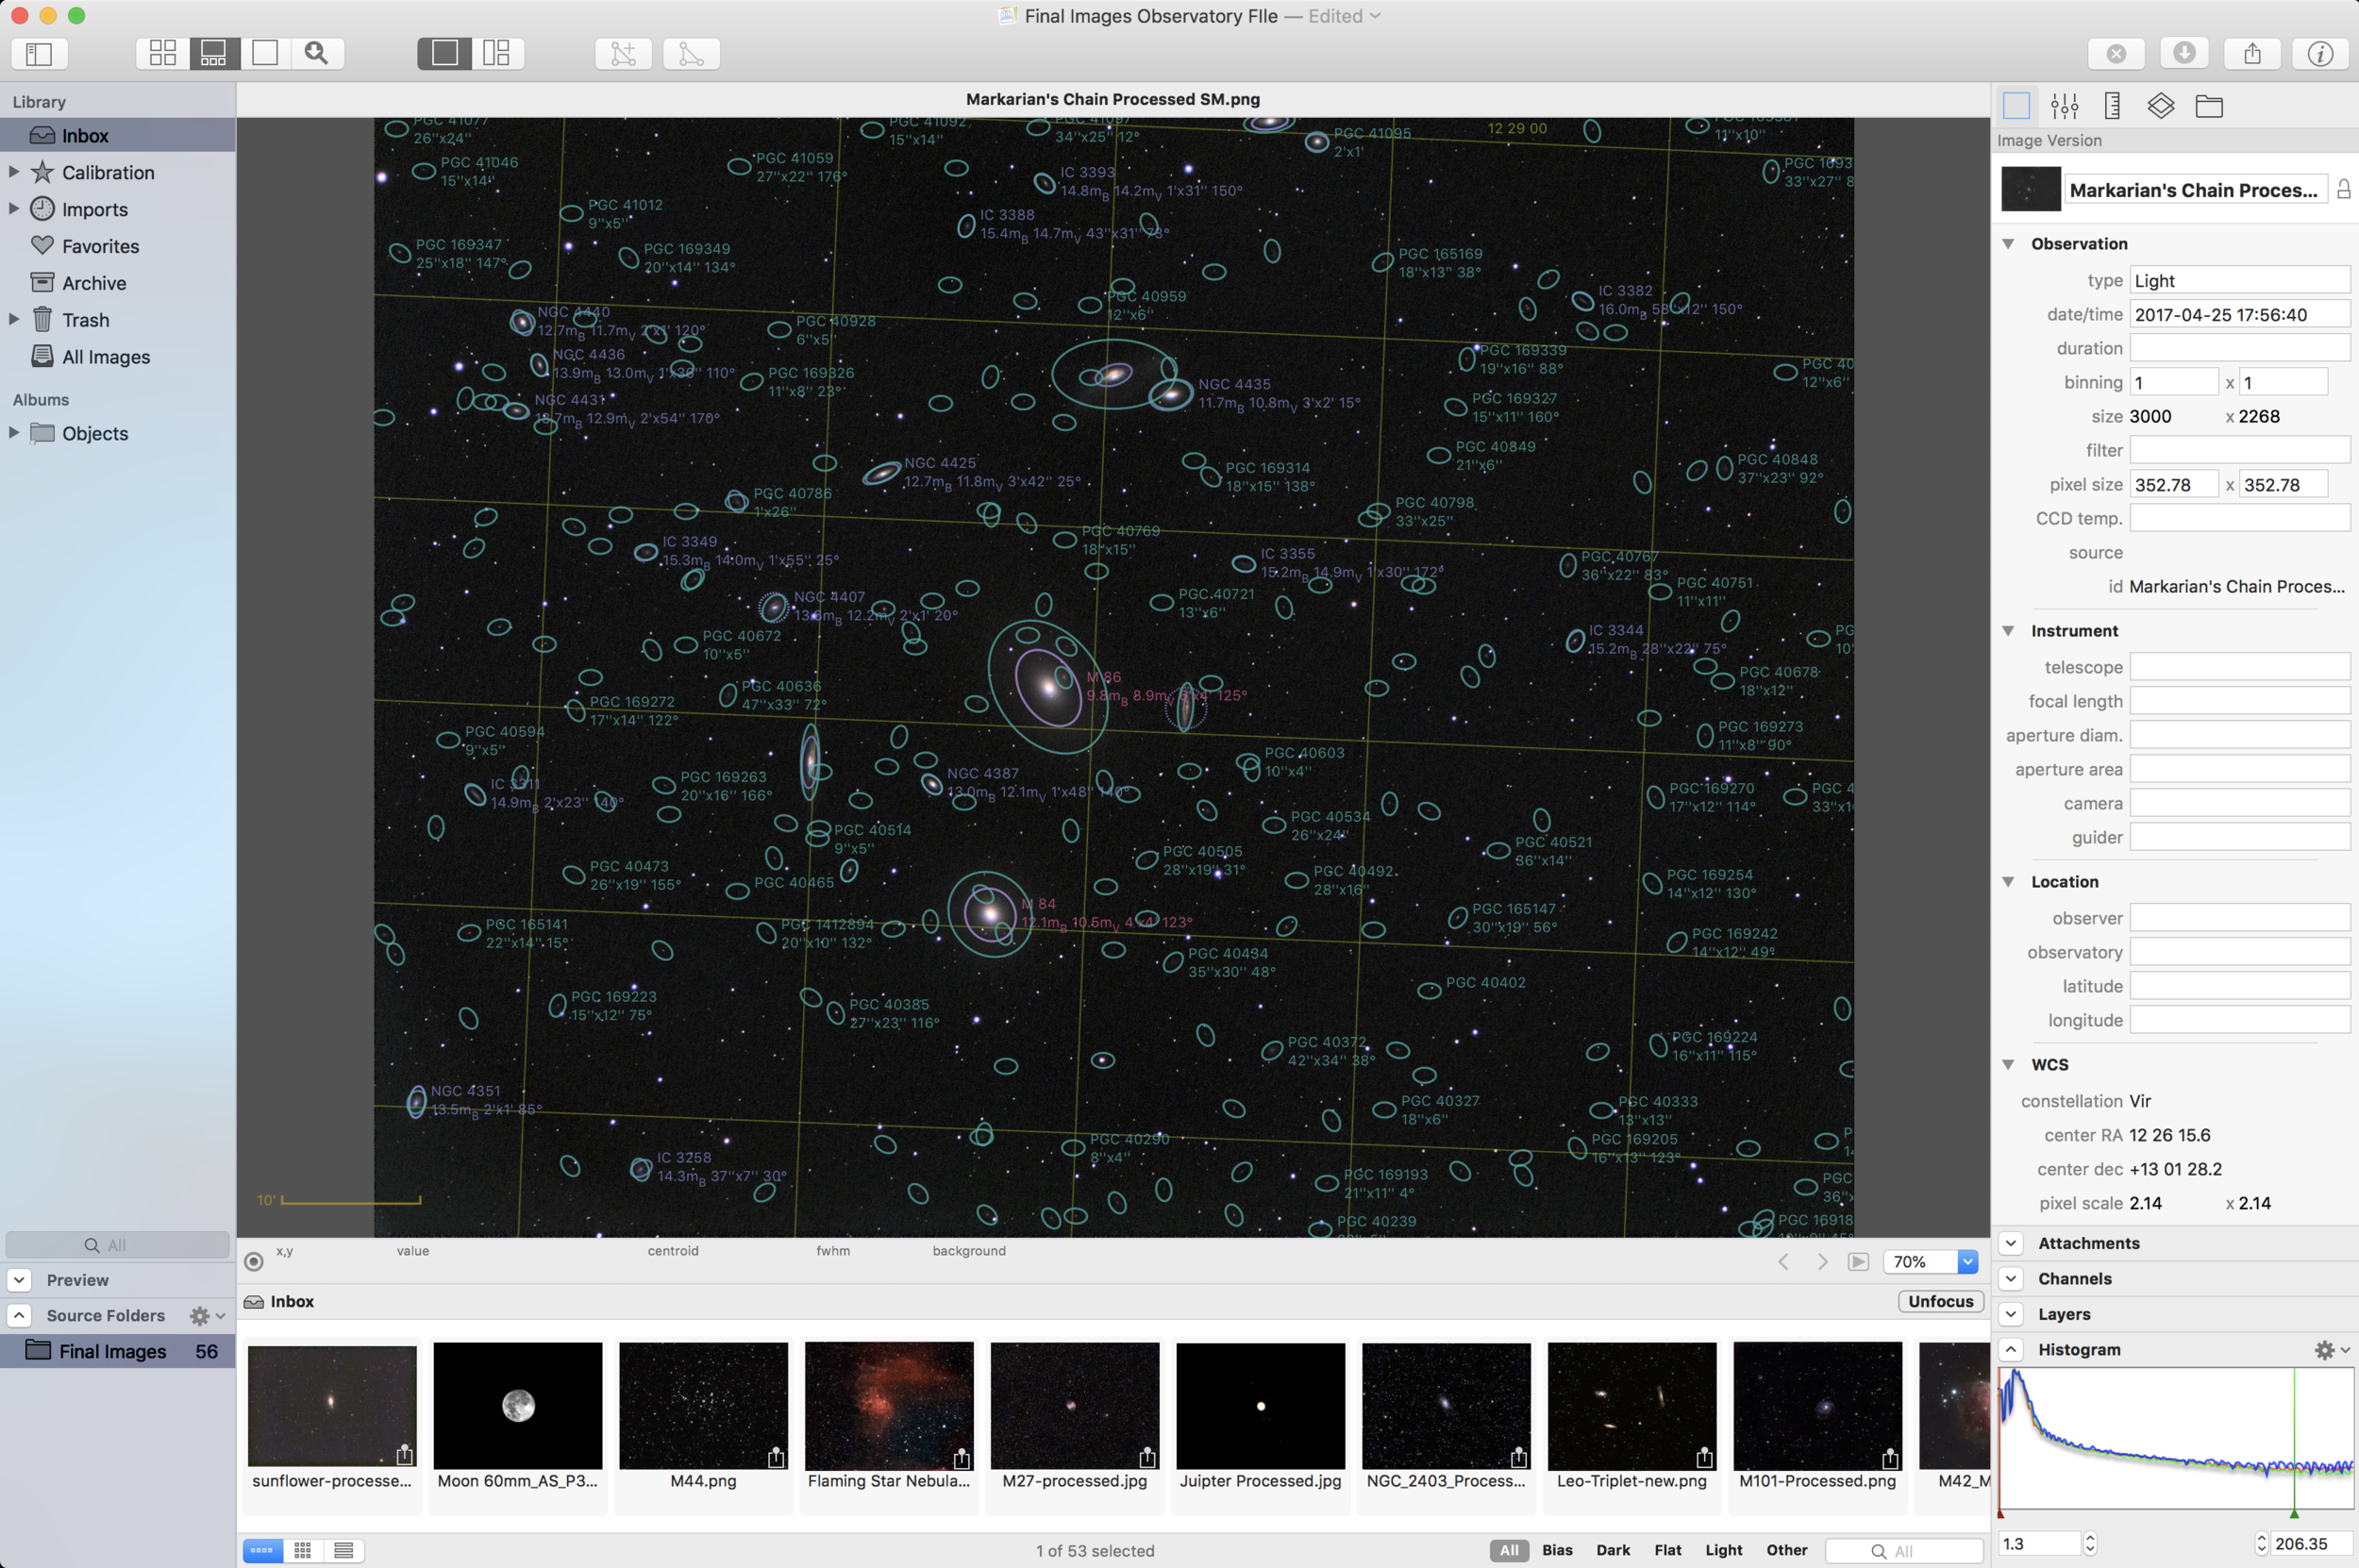
After importing your images (which is just a reference to your files on your drive, so very little additional space is required) you can plate solve the images for automatic tagging by all the known astronomical databases. The benefit of this is that any object you've purposely captured, or objects you inadvertently captured are tagged in your images. You can then create smart folders which then subdivide your set of images into nice little categories like galaxies, nebulas, planetary nebulas, etc.
Additionally you can batch tag your images with equipment you used, and also have those same images flow into smart folders for sets of equipment you used. The benefit being that you might have imaged a smaller galaxy or object with a wide FOV set of equipment, and you want to revisit that object with a narrow FOV set of equipment. This could really help in planning your imaging sessions going forward. And, if your'e a completionist like I am, and intend to image the whole Messier catalog, this is a great way to keep track of it.
Automatic tagging and smart folders, show you what images in your library match the criteria of the folder selected.
There are some light weight stacking, and calibration features that work well for one shot color cameras, which take folders of hundreds of images and displays them in a single stack to mitigate the clutter. I would like to see some way to integrate mono channels into single stacks by selecting each channel and assigning it a color.
Additionally, a small, but powerful feature of adding astronomical image types to quicklook is an amazingly beneficial too for browsing your images in the finder. No more loading images to see what they are, when you select one and press the spacebar, you see it instantly.
Some things I'd like to see come to a future version are better management tools for your equipment, since this is only done through tagging right now. I would like some place to store equipment I own, so it's easier to select when tagging images. I'd also like to see FOV overlays of my equipment on some of the research portions of the data. (Incidentally, the application has access to vast NASA libraries of images you can download into and view.) It would be nice to pull up a Hubble image and see how my gear could frame it, and what might be the best possible set of gear to use when planning a session on a particular object. Other information like object rise and set time based on my location would be beneficial for planning sessions.
In all though, this is a great v1 of a cataloging application for astronomical images, and I look forward to what v2 will bring.
M101 and surrounding nebula are auto tagged once the image is plate solved.
Markarian's Chain has an enormous amount of galaxies hidden deeper into the image that are only revealed after plate solving.


